Step 1
Setup Android Studio SDK
Set android_sdk_home, android_home, java_home
Step 2
Install Cordova globally
npm install -g cordova
Step 3
Existing Angular project
ng new hello-app-world
ng serve
open http://localhost:4200/.
Step 4
New Cordova project
cordova create hello-app-world-cordova com.example.hello OurFirstApp
Step 5
Navigate in to the created Cordova project and add Android as platform.
cordova platform add android
Step 6
Now merge the just created Cordova project into our Angular project. Copy every folder and file of the Cordova project expect the package.json, the package-lock.json and the node_modules folder into the Angular project root. The folder structure of your Angular project should now look something like this:

Folder structure of the Angular project root
Step 7
Merge the Cordova package.json into the Angular package.json.
Don’t copy the scripts object from the Cordova package.json.
The resulting package.json in your Angular project should now look something like this:
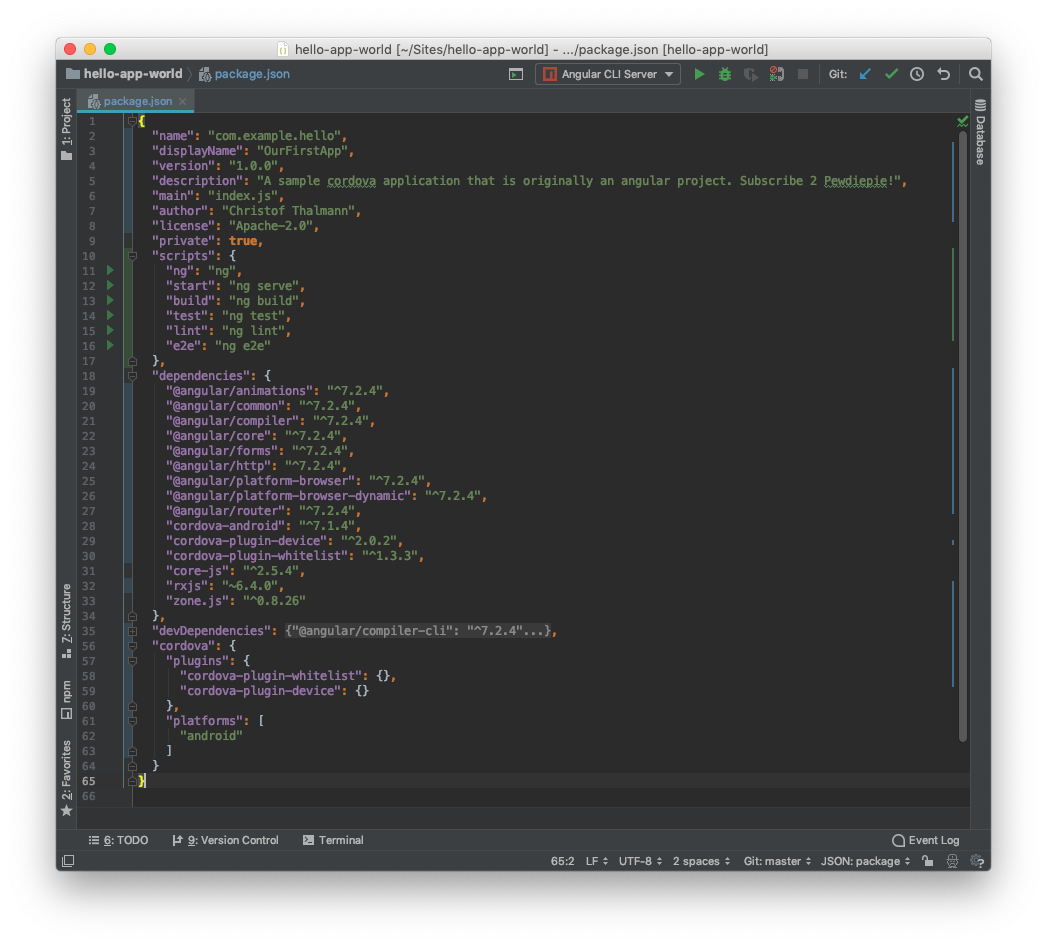
Structure of the Angular package.json
npm i -D execa
{
“name”: “hello-app-world”,
“version”: “1.0.0”,
“scripts”: {
“ng”: “ng”,
“start”: “ng serve”,
“build”: “ng build”,
“test”: “ng test”,
“lint”: “ng lint”,
“e2e”: “ng e2e”
},
“private”: true,
“dependencies”: {
“@angular/animations”: “~11.2.9”,
“@angular/common”: “~11.2.9”,
“@angular/compiler”: “~11.2.9”,
“@angular/core”: “~11.2.9”,
“@angular/forms”: “~11.2.9”,
“@angular/platform-browser”: “~11.2.9”,
“@angular/platform-browser-dynamic”: “~11.2.9”,
“@angular/router”: “~11.2.9”,
“rxjs”: “~6.6.0”,
“tslib”: “^2.0.0”,
“zone.js”: “~0.11.3”
},
“devDependencies”: {
“@angular-devkit/build-angular”: “~0.1102.8”,
“@angular/cli”: “~11.2.8”,
“@angular/compiler-cli”: “~11.2.9”,
“@types/jasmine”: “~3.6.0”,
“@types/node”: “^12.11.1”,
“codelyzer”: “^6.0.0”,
“cordova-android”: “^9.1.0”,
“cordova-plugin-whitelist”: “^1.3.5”,
“execa”: “^5.1.1”,
“jasmine-core”: “~3.6.0”,
“jasmine-spec-reporter”: “~5.0.0”,
“karma”: “~6.1.0”,
“karma-chrome-launcher”: “~3.1.0”,
“karma-coverage”: “~2.0.3”,
“karma-jasmine”: “~4.0.0”,
“karma-jasmine-html-reporter”: “^1.5.0”,
“protractor”: “~7.0.0”,
“ts-node”: “~8.3.0”,
“tslint”: “~6.1.0”,
“typescript”: “~4.1.5”
},
“cordova”: {
“plugins”: {
“cordova-plugin-whitelist”: {}
},
“platforms”: [
“android”
]
}
}
Delete Package.lock.json, node modules and JDk = 1.8
Install Gradle , set path
Step 8
index.html (Angular project) – change the base href from <base href=”/”> to:
<base href=”./”>
Step 9
Go to the tsconfig.json and make sure in compilerOptions the target is set to es5!
Step 10
On default Angular creates a /dist folder when building your project while Cordova builds its APK into the /www folder. We need to have one unite target path. Go to the angular.json and change the outputPath to “www”.
“outDir”: “./www”,
Setup is now done. Let’s build our Angular app and then wrap it with Cordova.
ng build –prod –aot
cordova build android
Hurray! Now your APK is ready for testing on a virtual Android device. Open Android Studio. Open the Android Virtual Device Manager. Create a new virtual device (hardware and Android version as you like). Start the device. Once the virtual device has booted, you can start the debug APK on your virtual device with this command:
cordova emulate android
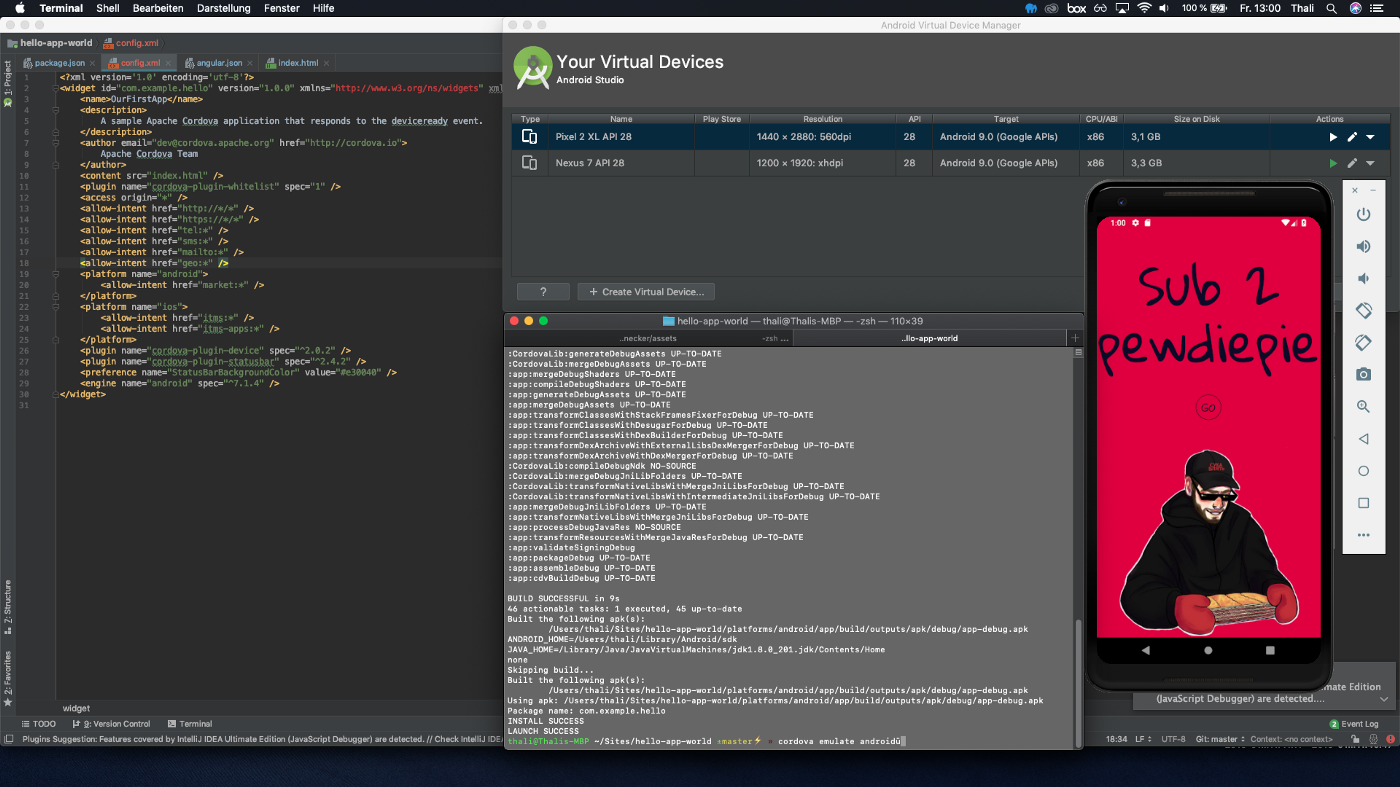
App running on a virtual Android Device
It’s that easy. With these few steps you can convert your Angular project as a hybrid app into an Android app for smartphones. *
*It’s also pretty easy with other platforms like iOS.
One small step is yet to come: Our debug APK currently only works on virtual Android devices. In order to be able to install the APK on real hardware Android devices or even make it available in the Play Store we have to release and sign the app. An unsigned APK can not be installed on Android systems. But we can easily sign our APK ourselves.
First we need to release the app:
cordova build –release android
This will create an unsigned version of your APK at platforms/android/app/build/outputs/apk/release. To self-sign our APK we need to generate a keystore:
keytool -genkey -v -keystore helloappworld.keystore -alias helloappworldmobileapps -keyalg RSA -keysize 2048 -validity 10000
The keytool command will prompt you with a password and other certificate fields. After you filled out the fields a keystore file will be generated. Store your keystore very carefully!
Then we need to sign the java archive package:
jarsigner -verbose -sigalg SHA1withRSA -digestalg SHA1 -keystore helloappworld.keystore app-release-unsigned.apk helloappworldmobileapps
One last mandatory step if you want to upload the APK to the Play Store (Zipalign is a tool provided by the Android SDK. If you have configured your $ANDROID_HOME var incorrect, you can find zipalign with this command: find ~/Library/Android/sdk/build-tools -name “zipalign”.):
zipalign -v 4 app-release-unsigned.apk app-release-signed.apk
That’s it. Now you have your release-ready and signed APK that you can install on your Android smartphone